Give Thanks Free Printable

How was your Thanksgiving??  My sister came to Boise to spend Thanksgiving with us and it was so nice to spend time with her and her boyfriend.  The best part about the holidays is getting to see family I haven't seen in a while!  I have so much to be thankful for, especially this year with our new house being built (almost done!!!!) and a new baby girl on the way!

I did this printable for Ella Claire Inspired for Thanksgiving and thought I'd share it with you just in case you wanted to print one off and store it away for next year with the rest of your Thanksgiving decor.


This is my mom's china cabinet.  She let me take pictures of my printable with her decor while my stuff is all packed away.  Only a couple more weeks till I can take pictures of my own house! I'm so excited!


This is an 8x10 print.  Print it on nice card stock paper, cut it out, and you're ready to go.  You can print it HERE.  Thanks!

  I'd love for you to follow along with me!  Find me on Facebook, Pinterest, and Instagram.


This post was originally published at Ella Claire on October 29th


Pickup full of Pumpkins Free Printable

There are so many gorgeous Fall Home Tours floating around right now.  I'll have to wait till next fall to decorate my own home (officially being built now! yay!!) but I'm already taking notes about what I like so I am prepared for next year.  Besides, just because I don't have a home to decorate doesn't mean I can't work on cute fall printables!


I love old pickups!  I think they are so cute.  You can download the print as a 5x7 or an 8x10.  Print on nice card stock paper, cut it out, and you're ready to go.
 I love the idea of using this print next year in my NEW house surrounded by a bunch of pumpkins!  Ah... someday! I'd love for you to follow along with me!  Find me on Facebook, Pinterest, and Instagram.  Happy Fall!

Find the 5x7 print HERE

and the 8x10 HERE


Shared at: The Blissful Bee, Cherished Bliss


DIY Spooky Banner


It's still September, but I've been itching to get out my Halloween decor.  We are getting ready to move out of our little apartment (and into our first house!) and my mom has been so great to let me style her house to take pictures of my projects.  I can't wait till I'm decorating my own home!

I made a really simple banner in picmonkey.  You can just keep it like it is but I wanted to add something to it.  

For this project, you'll need:
 -printable banner (print it HERE)
-black paint
-paint brush
-lace ribbon


You don't need a lot of ribbon.  Just cut off a small piece and paint it black.  Then press it onto your paper like a stamp.  I loved playing around with it till I got the design that I wanted.


My mom and I found these awesome burlap banners for a couple dollars at the Dollar Spot in Target.  I love Target!  I wish I had bought a ton of them while they were there.  It was so easy to just cut out my banner and tape it to the burlap banner.  If you don't have a burlap banner laying around, my other idea was to use black construction paper and twine.  


I couldn't decide if I liked the WICKED blocks or the lanterns and bottles better.  I love playing around with bottles.  We had these chalkboard label stickers and I used a white pen to write my potion labels on it.


Halloween decor is so fun!  I keep thinking of new ways to spookify my home!  I'd love for you to follow along with me!  Find me on Facebook, Pinterest, and Instagram. Happy early Halloween! 

Free Printable Big Sister Sign


I have exciting news to share on the blog today!  I'm expecting a new baby girl in February!  We are so excited for the newest member of our little family.  I wasn't as open with this pregnancy as I was with my last and by the time I found out the gender, I wanted to do something special to announce my pregnancy.  I decided I wanted my Lucy to hold a sign that said "I'm going to be a big sister".  When I didn't find one that I liked, I decided to draw one instead. 


I had originally planned to use the chalkboard print version but I ran out of time and used the black and white instead.  Either one would be cute!  All you do is print on card stock paper and you're ready to go!


It was fun to draw and if someone asked me, I'd draw one for a big brother too :) 

You can print the black and white version HERE and the chalkboard version HERE.  Enjoy friends!

Free Birthday Card

I hate buying cards.  I stand in the aisle for twenty minutes going through cards and when I find a decent one, I flip it over and about fall over when I read the price.  Let's be honest, not many people keep cards.  I'd rather spend the money on the gift than on a paper card that is just going to be thrown away.  I was looking through Pinterest for printable cards and there just wasn't a lot to choose from.  It was time to get creative and make my own.  The pretty flower graphics are from Creative Market and I put it all together in Picmonkey.


All you've got to do is print it, cut it out, and you've got a cute FREE card!  No more wandering card aisles and no need to panic when I forget to actually get a card.  If you're looking for a bigger selection of free cards, check out GreetingsIsland.com !  They have a huge collection of free cards that can you print out or send online.  They have cute cards for every occasion that you can personalize yourself!  Our card aisle days are over!


You can print it HERE. Because sharing some Birthday love should be stress free, right?  Enjoy!


You might also like:

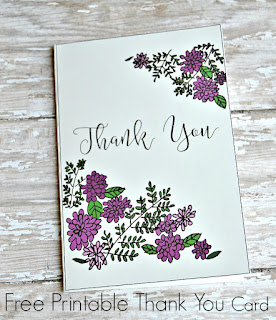
http://www.mysomedayinmay.com/2016/03/free-printable-thank-you-cards.html


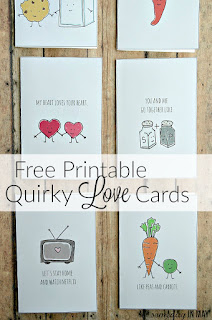
http://www.mysomedayinmay.com/2016/01/quirky-love-cards.html

Sea Shell Collection


This post received a lot of love when it was a guest post on Ella Claire Inspired and I must say, it may be my favorite project I've done so far!  I created this print because I really love old encyclopedia-like pictures and I wanted one of sea shells for my bathroom.  I found all the sea shell graphics at thegraphicsfairy.com.  The Graphics Fairy has such an amazing collection of prints and graphics and I was so excited to find the perfect shells for my project.


After I found my seashells and the perfect time-worn paper background, I headed on over to Photoshop to get started.  But just putting the seashells on the page wasn't good enough.  I wanted it to look like a real journal with notes about each shell scribbled on the page.  I felt like I was doing a school project again when I was doing all this research on different shells!  It might sound like boring work, but learning about shells was actually really interesting!  I had to make a couple educated guesses as to what a couple of the shells were called, but based on the pictures I sorted through, I think it is pretty accurate!  Every shell is beautiful and different and has its own story.  I intentionally found a font that looks like a messy cursive but I think it is still legible enough to read the notes I made.


The print was made specifically to be a 16x20.  Anything bigger or smaller than that and you'll have to crop or deal with resolution issues.   I printed mine at Costco and added a 1/2 inch border to it.  I added the border because I had a pretty chunky frame and I didn't want any of the writing to be cut off. 

I love that I can hang this in my entry way during the summer and now that summer is almost over, it will have a place in my bathroom in the winter!   Hope you can find a place for it in your home too!

Download and print it HERE. 


This post was originally published at Ella Claire on May 14th 

Lucy's Princess Party

This year my little girl turned 2! We went to Disneyland just a couple days after her birthday, so I decided it would be fun to throw her a princess party.

I used a white cloth shower curtain I got from Marshalls as my backdrop.  I made the banner out of pages of a book from the dollar store.  The font is called Rage and I think I downloaded it for free.  All I did was tape the pages to a regular piece of paper and run it through my printer to print the letters on the page.  I hole punched the top and hung it with twine. When it wasn't blowing crazy in the wind, I loved how cute it looked!


Don't you love these beautiful cake stands??  I borrowed them from my mom.  She bought them from Real Deals for my sister's wedding and I think I've seen them at every bridal shower, baby shower, and any kind of fancy party since.  They are so timeless.


I wanted to incorporate berries somehow into the dessert because they are Lucy's absolute FAVORITE thing in the world.  We made chocolate trifles with brownie and cool whip/vanilla pudding (recipe at the bottom of post) layers with raspberries, blueberries, and strawberries on top.  We put them in clear plastic cups.  They were so good, I wanted to eat them all! 


We also had cute sugar cookies.  I found the cutest cookie cutter shapes at a little store downtown.  I used a shoe, a crown, a dress, and a teapot.


It was a simple party but I love how it turned out.  And my Princess seemed happy too.  :)


Here's the Cool Whip/Pudding mixture recipe for the trifles if you want it!  Add brownies and berries and it is so delicious!

Cool Whip/Pudding Mixture
1 small box Vanilla Pudding
1 1/2 cups milk
and then fold in 6 oz of cool whip. 

Paper Roses


I love having flowers in the house but to be honest, I don't have them very often.  I hesitate about spending the money when they are only going to last a few days and I get paranoid that I will have bugs in the house.  I'll admit that I normally buy fake flowers.  I look for flowers that look real enough that you have to be up close to see that they are fake, but these can get pricey.  Well, I've got a great DIY project for you that gives you REALISTIC looking flowers for CHEEEEEEAAAPP!  My husband even said, "Wow, I thought you bought real flowers!" Which makes me quite happy inside :)

You'll need:
Dollar Store flowers (you could also use a stick or something from outside)
Scissors (not pictured..oops)
Crepe Paper (you can also get these at the Dollar Store-2 for a dollar) 
Hot Glue Gun

First, you'll need to cut out your petals.  I've seen other tutorials that say to cut petals in different sizes but I opted to just do them all the same.  After all, nap time is not that long... and my baby will be awake before I cut out perfect petals!  Each flower took about 10 petals to put together. 


Now that you have your petals, pinch the bottom and round the top with your thumb so that it looks like a real petal.


Add a small dab of hot glue to the bottom of the petal and stick it to the stem.  Use your scissors to press the petal against the stem so you don't burn your fingers.  Don't worry, we'll hide that ugly glue blob.


Now keep adding petals.  There are no rules, just apply where you think a petal is needed and keep going till you're happy.  Bend and open up your petals as you go.  Sometimes I would trim a few petals once I was done just so they all looked even. 


Once you get going, it'll go faster.  Just remember to use your scissors to press the petals to the stem.  It took me a couple blisters to figure out that one!  When you're done, find yourself a cute vase or jar and you're done! 

I added some rocks to my jar to hide the stem.


So nice to have flowers that won't die! :)